
Quick Started for Web Services
This quick started guide assumes the setup page is read and the environment is prepared.
The complete source code is in github.
User Story
For a software development, defining the user story is the first thing. Our quick started user story is this.
I want to kick off a web map software for browser. The client library such as Leaflet is not capable to use my own data, while the other map server library is expensive or heavy or maybe not easy to deployment on various OS. Thus, I want to firstly build my own mapping server for my personal business. And then work with map UI library such as Leaflet to make it to represent on browser. I also want it easy to deployment.
Let’s Get Started
There are many easy to use web framework to build a web service. To make this quick start guide simple, we will use Ginkgoch Map Library and Plain JavaScript to build this first map service.
Prepare The Project Baseline
Make sure the Setup for Service Specific is read and installed the necessary dependencies.
1 | mkdir quick-started-service |
After those commands are executed, we already setup our project base line: created a project folder, init the dependency management config file, installed the necessary modules, created a service entry point file and open visual studio code as our later IDE. Now we are ready to code.
Start to Build Map Service
Create a Simple HTTP Server
Fill the following code into index.js and that’s done.
1 | const http = require('http'); |
Execute node index.js, a HTTP server will be hosted at http://localhost:5500.
Add Tiled Map Route
Refer to this wiki page for more detail of tiled map server. We are going to implement one of its standard XYZ tile to implement it. We assume our XYZ tile route URL is /maps/default/{z}/{x}/{y}. I think this route could be RESTful and easy to extend the resources later. Let’s move on.
1 | const http = require('http'); |
Here pastes the getTileImage function separately for extending the mapping functions later.
1 | async function getTileImage(x, y, z) { |
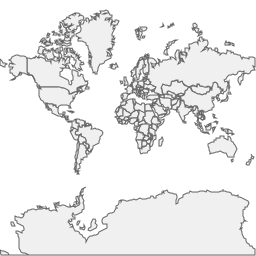
Let’s restart our server by node index.js again. Visit http://localhost:5500/maps/default/0/0/0 will response a world wide image with countries.
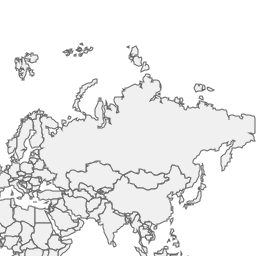
Try another url for one level down http://localhost:5500/maps/default/1/1/0.
Summary
In this page, we create a tiled map service with Ginkgoch Map Library and Plain JavaScript. It seems pretty much code, but it is from 0 to 1 to walk you through the entire process. Later, we will introduce advanced way to make the project modern and fancy. Until next time.